Note: this is a long post. If you just want the photos, go to the bottom and check out the gallery sans the witty, incisive, profound, and irreverent banter.
This is the continuation of the posts documenting our September 11, 2017, visit to Glacier Bay National Park.
The photos below are a mish-mash of various views as we sat at the end of the bay combined with numerous shots as we made our way back toward the next destination — and the subject of the third post (and maybe fourth post) covering Glacier Bay — the John Hopkins Glacier.
These photos may or may not be in chronological order. The timestamp says they are, but some don’t jive with my memory and some don’t seem as if they are in the right sequence. Just so people know, some of the photos have multiple versions and I’ll only include a few in the body of the post. All of the photos will be in the gallery at the end of the post except for the full-size panoramas. I’m also repeating the introduction from Part 1 for them who can’t be bothered to go back and read it and for new visitors who don’t care about the previous set of photos.
The text in the repeated section is colored in light blue. If you already know the stuff, go to the end of it.
There is a gallery at the end of this first post and a SmugMug gallery HERE. Photos in SmugMug can be viewed full-size. Note that the SmugMug gallery will contain all the photos from Glacier Bay; those from this post (Part 1) will be in there when the post goes live and those of the next post(s) (Part(s) 2(3,4,n+1)) I’ll add as the posts go live.
You can click on the photos in the body of the post to see a larger-but-less-than-full-size-version. A few of the big panoramas will link the full-size files but be warned . . . they are huge. Huger than people have ever seen before. Don’t click on those links unless you’re enjoying a biggly Interweb connection. Also, if you have biggly Interweb but you’re reading this on a phone — which is sad; VERY SAD — I wouldn’t bother with the full-size photos because they are HUGE; huger than anyone else’s huge photos.
September 11 had me shoot a total of 1,018 photos (straight-up photos, no HDR bracketing) and a few videos. Readers should be thankful I pared those down to a shade over 20% of the total. Even at 221, most people’s eyes will glaze over and either briefly scan one or two or skip the lot and go investigate the mysterious Project 313.
I kid, of course . . . I’m not done processing all of the 1,018 photos and 221 is just what I have right now; there will be more. Remember, these are only from September 11, 2017.
Note: you will see different processing as the photos have three different cameras (although the majority are from the D7000). Also, the lighting kept changing throughout the excursion into Glacier Bay and depending on the angle of the Coral Princess relative to the sun, it made for continuously changing shooting conditions. Also, as I processed the photos, I tried different adjustments and when I found some I liked better than the previous, I didn’t always go back to reprocess the earlier photos.
I should probably do a brief introduction . . .
First off, here’s the Princess Patter for the 11th of September of 2017. For them who don’t click on links, we were scheduled to pick up the Glacier Park National Park Rangers at 9:00am at Barlett Cove. For them interested, here’s a map of the area (part of the pamphlet published by the NPS).
Wait . . . before that, here’s a map of the whole area, including the previous stop (Disappointment Bay at Yakutat Bay) and the next planned stop Haines (was supposed to be Skagway). The picture below can be clicked for a much larger version (4.4MB).

This next map is from the Glacier Bay NPS website (again, click for a larger version – 3.5MB).

For them who don’t click, here’s the inset (clicking will get you a slightly larger version)

The Patter says we would visit the Margerie Glacier and later the Lamplugh Glacier but we actually had time so we went all the way to the John Hopkins Glacier (via the John Hopkins Inlet).
In the interest of being thorough, next to the Margerie Glacier sits the Grand Pacific Glacier. One final note . . . from the entrance of the park to the Margerie Glacier, one travels roughly 65 miles by boat. It takes a while.
Here’s a bit more information:

For them who be wanting the information provided by Princess, here are Princess Glacier Bay flyer and Princess Glacier Bay flyer 2.
Right, that be enough background stuff to bore even the staunchest readers to tears. ElBob — I’m sure — has already left.
~ ~ ~ ~ end of the repeated text from Part 1 ~ ~ ~ ~

That is a mani-shots panorama. Them enjoying great Interweb speed can click HERE to get the full-size version (13MB – 13,370 x 3,660 pixels). If you click on the link, the original will open in a new window and you can then click on the photo to zoom in and out of the various portions of the panorama. I’m writing these instructions here and I won’t repeat them for the rest of the panoramas.
Many of the photos have a B&W version. In some cases — but not all — I’ll present both of them for comparison. All of them are in the gallery at the end and, of course, in the SmugMug gallery.
So, for instance, the above has a B&W equivalent . . .

Click HERE for the original (11MB – 13,370 x 3,660 pixels).
Let me explain something for them curious about these things. The above is a panorama composed of multiple photos; probably something between five and ten photos. Occasionally there are even more photos composing the scene. The above is composed of photos in landscape orientation.
I typically create the panorama before making any adjustments to the shots (easier to seamlessly blend the photos if they’ve not been adjusted). So, for instance, that same scene was also shot with the camera in portrait mode and here’s the panorama before I make any adjustments.

My typical adjustments on a scene like that — a scene with very light and very dark areas — looks something like this:

I’m trying to recover as much detail from the shadows without blowing out the bright areas. Were I just presenting one photo, I might process the photo as Ansel Adams used to do; I’d dodge and burn different areas different amounts to arrive at a fairly balanced shot that shows consistent detail across the whole scene.
Because I have hundreds of photos and because no one is going to pay me even $2 for any of them, I do global adjustments. Side note: some might argue that if I were to take more care in the processing, someone might pay me $2 for the end result. A bold claim and one that belies my experience.
Now, here’s the interesting (to me) thing . . . I can do better balancing a scene if I work in B&W. For instance, the above comes out like this:

Click HERE for the original (13MB – 11,090 x 5,100 pixels).
This is just me expressing my uninformed opinion but I think I can “push” the processing of the B&W photo much more than a color photo because while the color photo will start to look “unrealistic” with weird and unnatural color shades, the B&W photo just has different shades of gray and gray is still gray.
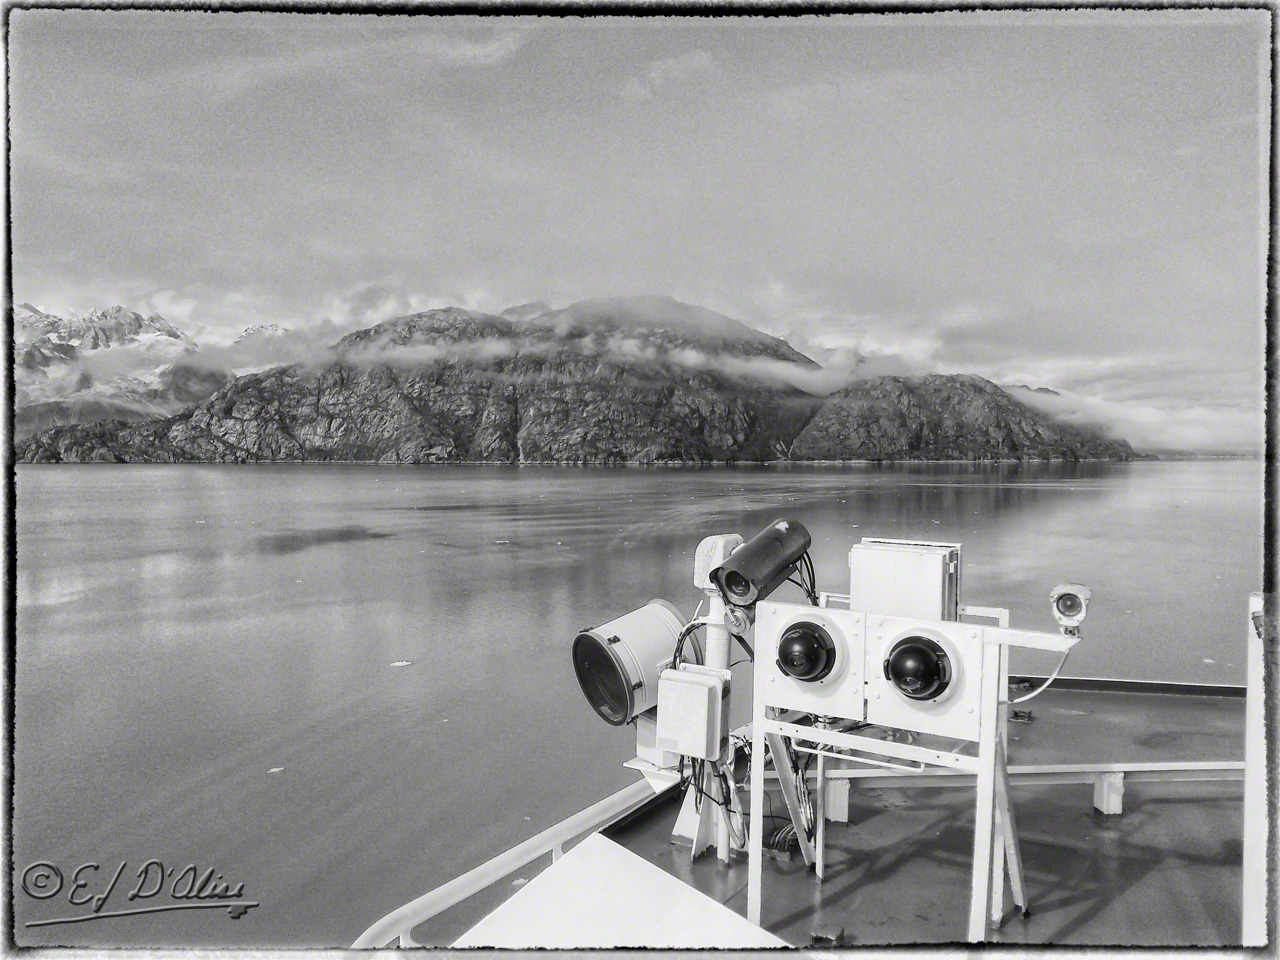
So, while the ship sat there, I’d go in and out (have a coffee or snack) and side to side (snapping photos of the surrounding landscape).


Even got me a bit of the hustle and bustle of the ship . . .

Some of the people had binoculars. I should have grabbed mine, but I was already juggling two cameras, a phone, and a pair of sunglasses. Still, I think next time I’ll take the time to examine the landscape a bit more closely because I occasionally look at the photos and see stuff I would have liked to study a bit more.
I mean, I took in a number of details with my photos and they do allow me to look at things fairly closely, but still . . .


For instance, this scene . . .

. . . also available in B&W . . .

It would have been nice to look at it a bit closer . . .

No, I mean closer still . . .

OK, but, it’s not dynamic, is it? I’m not watching the water travel down to the sea, am I?
OK, OK . . . but I’m still using the binoculars next time.
I’m going to run through the rest of the photos for this post pretty quickly. If you see a B&W photo, know there’s an equivalent color version that will be in the gallery at the end.
Like, for instance, at one point, this cloud moved in alongside us.

This is the other end of the cloud . . .

Here are two views of the Pacific Glacier . . . both are shot keeping the rule of thirds in mind . . .


I could actually combine both into a vertical panorama . . . but since I didn’t, you’ll just have to imagine it.
This is a neat lamp I captured during one of my forays into the interior of the ship.

Here are a few more photos (more at the end) . . .


We did see birds flying around but they were surprisingly difficult to capture. I only managed a few photos I was halfway happy with.


But, lots of different versions of ice, glaciers, and mountains.


Eventually, it was time to leave and head to the other glacier stop for the day. I thought our wake was interesting . . . or, maybe, I was super-bored with glaciers and ice stuff.


However, leaving gave me the opportunity to capture a few shots of the rugged terrain that had been in deep shadows and poorly lit when we had arrived . . .


It seemed like we had been traveling for a good bit but when I looked back . . .

So I took more photos of the surroundings . . .

The next series of photos I titled “difficult panorama” because Photoshop was having a heck of a time stitching it together . . . and I ended up using Affinity Photo to stitch it and edit it.

Yes, there’s a color version as well, but I’m only linking the original size in B&W.
Click HERE for the B&W original (17MB – 16,685 x 3,970 pixels).
Here’s a different version of it composed using photos in portrait mode.

What annoyed me was the sun making an appearance and bathing the dark glacier with better light once we were too far away . . . too far except for the zoom of the P900.


Once I had the P900 dialed in, I kept shooting . . .


That’s a panorama worth seeing at full resolution . . .
Click HERE for the B&W original (21MB – 12,590 x 5,418 pixels).


By then, we were a goodly way away from the glaciers . . .

. . . and a couple of panoramas were called for.


If you want to see the second one at full resolution . . .
Click HERE for the original (1MB – 4,784 x 819 pixels). Yes . . . only 1.0 MB because it’s shot with the panorama function of the P900 and not made up of stitched individual photos.
We were now even further from the glacier . . .

. . . and I wanted to see just how good the zoom of the P900 was under decent conditions . . .


OK, that last one is a bit soft but overall . . . pretty darn good.
Here are more conventional shots using the P900 . . .


So, true . . . if one goes to the SmugMug gallery and looks at the full-size resolution, you can see the JPG compression artifacts and you lose a bit of the detail. But, seriously, who does that?
Next up, some Samsung Note II photos that seem to be out of the timeline but I thought worth sharing.


So, I rave about the Note 8, but the Note II was no slouch.
That’s it . . . 221 photos and I’m still not done with Glacier Bay. The problem is that I’ve not processed the other photos yet.
It might take a few additional posts to cover all of Glacier Bay
And, yes, I know I’m overdoing it . . . but, that’s what I do. These photos are as much for me as for my readers, perhaps even more so because I’ll look at them again whereas readers are unlikely to ever look at these again.
For them who just wanted the photos, here’s the gallery of the above (without the large originals of the panoramas):


That’s it. This post has ended . . . except for the stuff below.
<><><><><><><><o><><><><><><><><><o><><><><><><><>
Note: if you are not reading this blog post at DisperserTracks.com, know that it has been copied without permission, and likely is being used by someone with nefarious intention, like attracting you to a malware-infested website. Could be they also torture small mammals.
<><><><><><><><o><><><><><><><><><o><><><><><><><>
Please, if you are considering bestowing me recognition beyond commenting below, refrain from doing so. I will decline blogger-to-blogger awards. I appreciate the intent behind it, but I prefer a comment thanking me for turning you away from a life of crime, religion, or making you a better person in some other way. That would mean something to me.
If you wish to know more, please read below.
About awards: Blogger Awards
About “likes”: Of “Likes”, Subscriptions, and Stuff
Note: to those who may click on “like”, or rate the post; if you do not hear from me, know that I am sincerely appreciative, and I thank you for noticing what I do.
. . . my FP ward . . . chieken shit.
Finally, if you interpret anything on this blog as me asking or wanting pity, sympathy, or complaining about my life, or asking for help and advice, know you’re likely missing my subtle mix of irony, sarcasm, and humor.

I read once that the optimum length for an article is 800 words. After that readers lose interest. In UK the BBC web site limits its articles to 800 words. I try to do the same. I liked the inclusion of the maps.
LikeLiked by 1 person
Yup! Been told that many times.
. . . I’m aiming for higher quality readers who have nothing better to do . . .
LikeLiked by 1 person
Yup! But never learn!
LikeLike
I agree . . . all I get are grumpy all people who complain a lot about younger people not having the attention span FSM gave a gnat.
LikeLike
I took your advice. I noticed that there wasn’t a photo of your feet/shoes/socks,so I presume that was on another of these voyages of discovery
LikeLike
This was primarily an eating voyage with some scenery thrown in to break up the meals and allow for some digestion to occur before the next meal.
LikeLiked by 1 person
Sounds sensible
LikeLiked by 1 person
It’s been warm here…very summery…the past few days…so these photos bring cool, calmness, and smiles! 🙂
LOVE the waterfalls vid!!! Wow!!! And the birds in flight! And the water! AND all of your captures!
HUGS!!! 🙂
LikeLike
Thanks, Carolyn.
There’s a lot of repetition in the shots but as I mentioned, in part it’s because it serves as a record of my memories for me and it will endure long after anyone even remembers the post is here.
I probably should distill these down a bit, but I figure it wouldn’t get anyone to look at them any more than they are.
LikeLiked by 1 person
Great long post! Wish I was there . . . could use a change of scenery . . . and cooler weather.
LikeLike
Me too.
LikeLike